Sunday, June 9, 2013

Challenge #8 - Homemade Vanilla Extract (success/fail ... TBD)

So many of the things I like to bake include vanilla extract. The quality of your vanilla extract can really make or break your baking. The only logical idea to me was to create my own!!It is surprisingly simple! I bought my vanilla bean at two different stores. I bought the first jar in Syracuse at a specialty kitchen store for ~$8 US. The second jar I pick up at Natural Food Pantry for (~$10). As you can see the beans them self are not cheap! I have since found a cheaper option online @ www.beanilla.com. They sell a variety of vanilla bean products as well as glassware. When I looked they had an option to buy 25 beans for $25! 

I chose Madagascar Bourbon Vanilla Beans 


I was able to find my glass jar at Dollarama for $2!!


The first step is to cut the beans in half and then split them lengthwise so that you expose the beans in the middle of the bean.


I used 4 full vanilla beans and placed the cut pieces in the glass jar. I then used 2 cups of vodka. Inexpensive brands are fine to use to make vanilla extract! So I just used some vodka that was lying around the house.


After adding the vodka you have to let the brewing extract sit in a cool dark place for 8 weeks!! It is recommended to give it a shake/swirl once a week. My extract is hiding in the basement and I will update how it turns out in about 8 weeks from now! I can't wait to start baking with it!!


Monday, May 27, 2013

Challenge # 7 - Tiled Flower Pot (Somewhat Success!)

     This challenge turned out to be quite the challenge to say the least! The original post chose a pebble tile to cover a metal bucket which would eventually be used as a flower pot. I loved the look and had to give it a try! I searched and searched for a relatively cheap pebble tile and of course could not find one I liked and was cheap enough for me (I found lots but most were at least $18-20 a tile and I wasn't willing to spend that for a flower pot). Instead I was able to find a mosaic glass tile at the Home Depot for $5.99. At the time this seemed like a great idea and it fit my budget. Little did I know this mosaic glass tile would be quite the headache for the bucket I had chosen. 

     First of all I had chosen this "round" metal bucket which was tapered and smaller at the bottom that at the top. And I had chosen a square glass tile....see where this is going!?! This led to spacing nightmares! I can now see why they originally chose a non-uniform pebble tile which spacing was totally not an issue. I am a perfectionist and this was enough to drive me insane.

This was the bucket I used ($2.50 @ Dollerama!)


This is the tile I chose. I believe it was called Ocean. It was on a mesh backing which was really convenient and easy to cut. I ended up cutting the tile into strips 1 x 6. I then started to adhere the tile to the metal bucket. This is where the spacing nightmare came into play. I had to place the strips at an angle such that the space between tiles at the bottom was smaller than the space between the tiles at the top. It was unfortunately the only way to do it with the tapered bucket. The only way I could have avoided this would have been if I cut the tile into individual pieces and that just seemed like WAAAYY too much work. I used the same adhesive I used for the Scrabble tile in an earlier post. I used regular scotch tape to hold it in place and let it cure overnight.  


Once the adhesive had cured I used Polyblend sanded grout in a white colour. I applied to grout according to the instructions on the box and I was pretty happy with the results. I decided to leave the strip of metal at the top of the bucket and haven't quite decided what I'm going to do with it. I'm either going to leave it as is or find some pebbles at a craft store and apply them to the top. What do you think? I'd love to hear your opinion! 

This is the bucket as of right now - I will post an update once I decide on how I want to finish the top and when I plant some beautiful flowers in it.


Here is the original post: http://pinterest.com/pin/452400725038632135/ 


Here's the pot with the planted flowers :)


Challenge # 6 - Mini Monkey Bread (Fail!...sort of haha)

So I didn't take many pictures of this one but it definitely provided some comic relief in my house the night I made it. The original post showed this really cute cupcake looking mini cinnamon bun looking things called mini monkey bread and it looked like this:


I followed all of the instructions and when I peaked into the oven almost at the end of the cooking time I burst out laughing at the look of them. This is what mine turned out to be:


Overall I called this a fail because it did not look like it was supposed to. However, it did taste alright so I suppose we could call this a half fail lol. 


Challenge # 5 - Scrabble Tile Coasters (Success!!)


I loved the way these looked on pinterest and I had to try them out. I'm not going to lie, these were EXTREMELY time consuming. I am lucky enough to have a lovely Aunt who shares the love of crafting and Pinterest and she is also sometimes my supplier for materials for these challenges. She supplied me with the old scrabble game and the adhesive. I had originally planned to use a hot glue gun but she had informed me that this adhesive would probably be better.

So I took the Scrabble tiles and arranged them into four letter words that I liked and fit together. 


I then lightly sanded the edges that I was going to apply the adhesive to. After that I applied the adhesive (following the directions on the box!) and began to stick the letters together. 


I started by gluing two pieces together and then I glued 2 two of those together making a four letter word. I let the adhesive cure and then glued four words together making the final coaster. Eventually I will seal them with some sort of sealant or clear gloss paint to protect it from spilled liquid, etc. 


And the Final 4 Coasters that I made

I did have some letters left over but I don't have enough variety of letters left to make any other coasters, unless I wanted to just make some that don't actually spell words. 


Challenge #4 - Topsy Turvy Terra Cotta Planter (Success!! After a few modifications lol)

This was a fun challenge for me but I did have to make a couple of modifications. I bought all the terracotta pots at the home depot along with a 4ft piece of rebar. I bought 1 10inch, 1 8inch, and 3 6inch pots. After several days of rain here I was finally able to start to put this together. I had decided that spray paint was the best option (Krylon Spray Paint from Wal-mart - $4.98). This was not necessarily the best choice and I shall explain. I chose a red and a yellow spray paint so that I could do an alternating pattern. The red was a good choice and covered well.... the yellow not so much. It was really hard to cover the terracotta with the yellow and as a result for 2 pots I used an entire can of spray paint and was not happy with the results (I still had some red left after spraying 3 pots and one was the largest of them all - gives you an idea of how the different colours covered). So to fix this, I got some bright yellow acrylic paint and painted the pots with it. Originally I thought only 1 coat should cover as I already had a base from the spray paint. Again I was wrong. It took three coats of the acrylic paint before I was happy enough with the result. You can still see the brush strokes on the yellow pots but I am ok with this. In order to have continuity between the spray painted pots and the painted acrylic pots, I sprayed the yellow pots with a clear gloss spray paint to add a glossy shine to it. Once this was done and dry I was able to start assembling it. I took a hammer and got the rebar into the ground so that it would be strong enough to support the pots. I then placed the first and largest pot of the group after placing it on the rebar, I then filled the pot with potting soil. After that I placed the 8inch pot in such a way so that it would lean to the side. I continued this until I reached the last pot. I had originally thought I was going to do the bird bath from the original post but after playing with the configuration of the pots I figured it was too difficult to ensure that the bowl stayed properly. I opted to make the top pot a planter as well and I was definitely not disappointed with the final result. I bought all the plants I used at Wal-mart and there is a list of those at the bottom of this post. I filled all the pots with Miracle Grow Potting soil and arranged the different flowers into each pot. And viola we were done! You can find both the list of plants I used and the link for the original post below!

The Front 

One Side 

 And the Other

The plants I used: French Margold, Petunias (3 colours - white, purple, red with white boarder), Salvia, Dusty Miller, Alyssum, Celosia, Vinca Vine, Coleus, and Lobella.


Sunday, May 26, 2013

Challenge #3 Chalkboard Base Wine Glasses (Success!!)

These are probably my favourite pinterest challenge so far as I was so happy with the way it turned out. It started with a purchase of large wine glasses from HomeSense and then the fun began. I bought a six pack of glasses for $12.99 and then I taped the stem where I wanted the paint to stop. 


After this I covered the rest of the glasses with old flyers and taped them in place. 

The original post dipped the bottoms into liquid paint. I decided for many reasons that I did not like this method and chose to use the spray paint option. 


I sprayed the base of each glass let it dry and applied a second coat once it was dry.


And this is the final product!


We tested these out last weekend with some homemade sangria! Five out of the six glasses turned out. The last one has to be redone as there was a spec on it and for some reason it dried glossy (I think this was because I added another coat because of the spec and it was drying at a cooler temperature).

Here is the original post:

Wednesday, May 22, 2013

Challenge #2 - Christmas Swirl Sugar Cookies (Success!)


    This was an interesting one for me as I got through adding most of the ingredients into my mixer and realized that there really was no liquid included (which I thought was really strange - only 1 tsp of vanilla). After mixing all the ingredients I realized that it was not going to work so I added an egg and then added some milk until I felt the dough was the right consistency (for these cookies it should be a thick but not terribly sticky, you need to be able to roll out the dough). Luckily enough these turned out to be the best cookies I've ever made and they also look awesome as well!

    Once you have the ingredients mixed you split the dough in two and you add food colouring to one of the halves. Once this is done you can roll out both colours of dough into rectangles this is best done on wax paper, this makes later steps easier. At this point you chill both halves in the fridge for 2hrs. After the dough is chilled you can remove and brush some water over one later and then place both halves together and seal together by pinching the edges. You can then roll both together. Once you have created your cookie log you can roll it in sprinkles - for this part they may not stick right away. I found I had to press the sprinkles into the dough to ensure that they would stay. Now it's time to wrap it in plastic wrap and chill for another 3-4hrs. After the chilling time you can begin to cut the log into cookies.


     Once you have the cookies cut you can lay it on parchment paper on a cookie sheet and bake for 15-17mins @ 350 degrees. These cookies were extremely tasty and look amazing!! I got several compliments on them at various Christmas get-togethers. The recipe is below as well as the original post :)


Recipe:

2 cups flour, plus possibly a few more tbsp
1/2 tsp baking powder
1/4 tsp salt
2/3 cup unsifted powdered sugar
1/4 cup granulated sugar
2 1/2 sticks unsalted butter (cut in chunks)
1 tsp vanilla
1/2 tsp of food coloring of your choice
1 1/2 cup holiday sprinkles
** I added an egg and just enough milk to get the right consistency

Original Post:
http://ouritaliankitchen.blogspot.ca/2010/12/colorful-swirl-cookies.html

Tuesday, May 21, 2013

Challenge #1: Braided Baked Spaghetti (Success!!)


     So this was one of my first official "Pinterest" challenges and it was definitely a success! I have since made it a few times and make some improvements and changes each time. It is definitely delicious and I even had my fairly traditional grandparents try this and enjoy it on a Sunday dinner (even though Sunday is "supposed to be roast day!).

    This first challenge I had with this recipe was finding the dough. I have unfortunately not been able to master the art of bread making so to save time, money, and many frustrations I decided to look for ready made dough. After checking out a couple different grocery stores, through asking questions at the bakery sections I found out that some stores will sell you their uncooked dough that they use for fresh bread they bake in the store daily (whether it be french, italian, etc). I found out that Sobey's will sell you frozen dough for the same price as their cooked dough (totally worth it in my opinion!). The first step is to roll out the dough into a rectangle (this may prove to be more difficult that you think!). 


    After it has been rolled out you can take some already cooked pasta with the sauce of your choosing and lay it down the middle of the dough. (**This is where I have made a change from making it again - I personally recommend using a homemade sauce (my mom makes a great one!) as it's much better than the canned but in a pinch canned sauce works well also). 


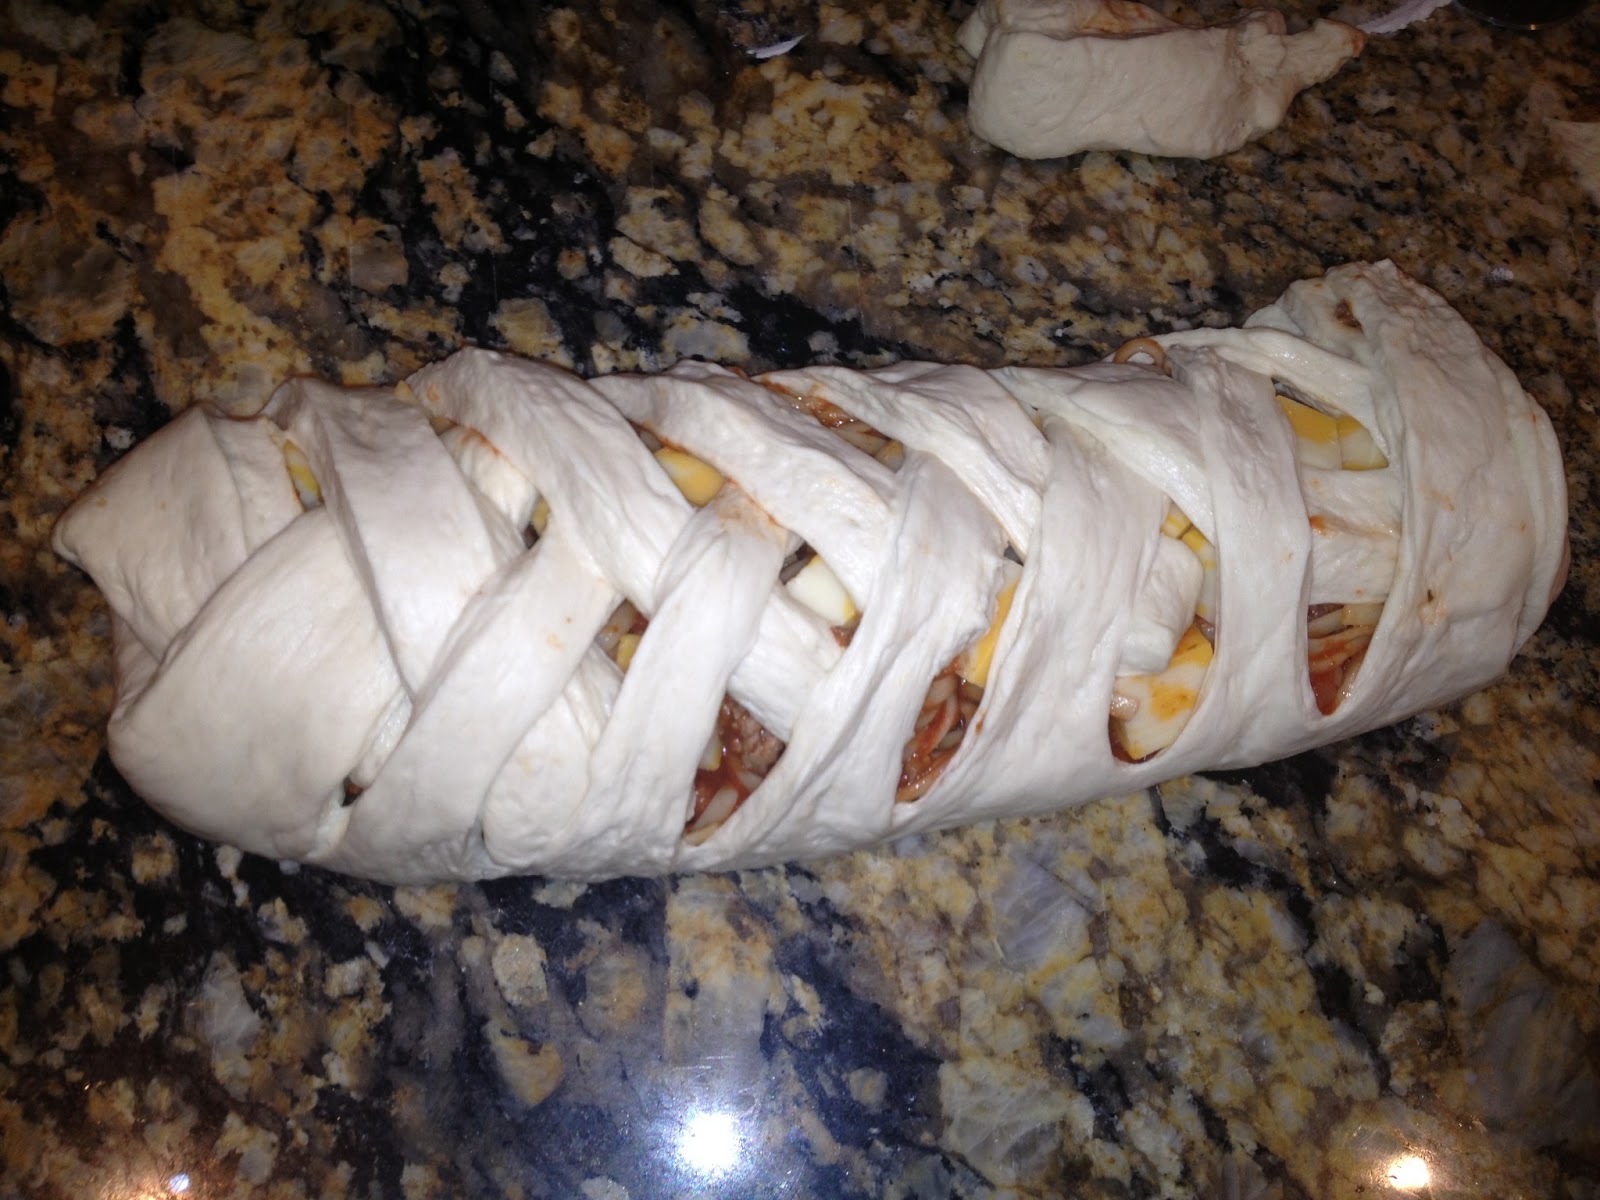
    Once the spaghetti is laid out you can cut up some cubes of cheese and lay them down on top of the pasta. You can then take a knife/pizza/cutter/etc (I used a pastry/pie rolling cutter) and cut the dough into strips up until the point of the pasta. Once you have done this you can start braiding the bread by folding one piece over the other and so on until you reach the end where you can pinch the end together.


    This is the point where I have also made some improvements since making it a second time. At this point I transferred the loaf to a parchment paper lined cookie sheet (probably the hardest part of the entire process....not even kidding). At this point I spread some melted butter over top of the bread and sprinkle some parmasean cheese, italian seasoning, and some garlic powder/mix. I found this was a missing piece the first time I made it as the bread seemed a little bland and this definitely helped. 

    The next step is to bake the bread. I won't give a specific temperature and time as it totally depends on the type of bread you choose and your oven. It takes ~30-35 mins and you want to cook it until the bread is golden brown. 

    Like I said at the beginning it turns out great and VERY YUMMY! Below is the link for the original recipe. I hope you enjoyed this post and continue reading my adventures in conquering different Pinterest challenges!

http://www.rhodesbread.com/blog/blog/braided-spaghetti-bread   (mine obviously does not look as pretty as the professionals here....haha)